Welcome to Minecraft University server and to the Highway 115 Project! Highway 115 is the best way to travel and explore. There’s also plenty of attractions and shops on and next to the highway too. So let’s learn how you can connect your portal to the highway.
Important Highway Notices
Do not remove any parts of the Highway 115 tunnel aside from the walls to access it. Objects that may not be removed include (but are not limited to) carpets, slabs, ice blocks, and buttons. You can decorate outside empty areas (labelled “Empty except signs or banners” in this diagram) with unobtrusive decorations (such as signs and banners) to make your connection more obvious. These modifications are at the Connection Consortium’s discretion and may be removed at any time.
No stores within the 100 ring road area. For season 9, as part of the community shopping district, a measure was passed to prohibit any roadside shops within the 100 ring road area. Instead, business should request a plot within the Overworld shopping district. Roadside stores are only allowed beyond the 100 ring road (more than 100 blocks in the X and/or Y direction).
Who This Applies To
Everyone except those within a larger community construction such as a town. If you are a member of a town or similar, it’s discouraged to build your own Nether Portal due to portal conflicts and space constraints on the highway side. In your case, you should utilize your community’s Nether Portal (or ask the Mayor / Leader to create one if it doesn’t exist).
What You Need

- Diamond pickaxe (to mine your temporary Nether-side portal)
- 10+ obsidian (to construct your Overworld portal)
- Flint and steel or similar (for lighting your new portals)
- A couple stacks of solid blocks (for pillaring and bridging)
What I Recommend
- Armor
- Food
- Signs
- A minimap and world map mod
- /highway (Our Highway 115 plugin)
- And this website!
Getting Your Portal Ready
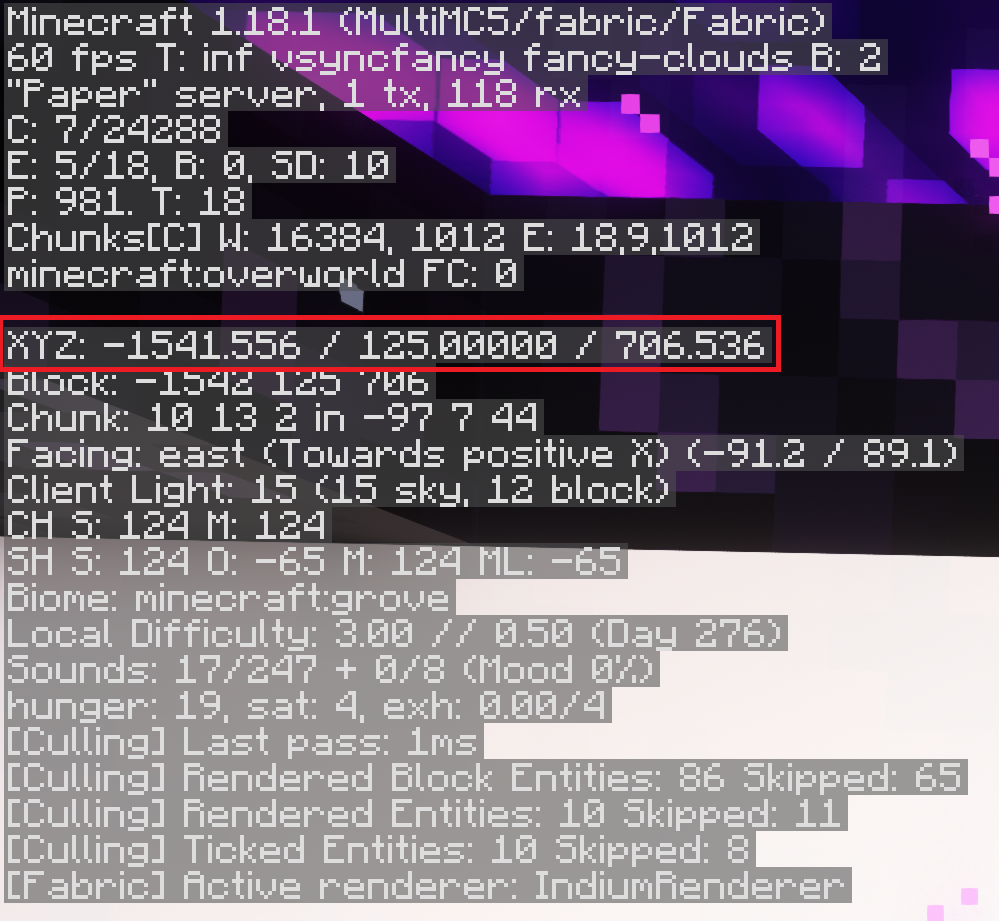
Build your Overworld side Nether Portal wherever you want! While you’re in the Overworld, check the coordinates of your portal (with the F3 debug menu on the left side) or use the /trigger nc_inOverworld command. The command will tell you your equivalent Nether coordinates. Otherwise, divide the X and Y coordinates by 8 to get your portal’s Nether coordinates. These nether coordinates are where you should build your Nether side portal (but at Y=115 of course!).


Now go through your portal to the Nether. In most cases, the portal you spawned at in the Nether are not at the equivalent coordinates you recorded earlier. This is because Minecraft searches for a nearby location in the Nether to place your portal instead of placing it exactly where the equivalent location is. Another (more unfortunate) reason is because your portal linked to some else’s portal. Go back through the portal to the Overworld to make sure it’s not linked to someone else’s. If it is, jump to the end of the document for how to fix this problem.
First up is to mine this portal you spawned in to get at least 10 obsidian since you are going to relocate it. Then pillar up. You’ll probably have to dig through some of the Nether roof to get to your target height. As you can guess by the name, this height is Y=115. Check your F3 debug menu (or your minimap utility) and pillar up until your Y coordinate is 115. This means that your player’s legs are at 115 and the block below you is at 114. This is the correct height to connect to the highway.
Now if you aren’t at the correct X and Y nether coordinates for your portal, dig laterally until you reach the location. Build your Nether-side portal there. If you did this correctly, you should be able to go back through the portal and end up at your original location in the Overworld.

Connecting to the Highway
Let’s go back to the Nether! Using your minimap, world map, or the Highway 115 route network map, determine the nearest highway or ring road that you can connect to. Start digging in that direction! If you can’t figure that out, then pick either your X or Y coordinate/axis, whichever is closer to 0. Begin digging in that direction until you either reach 0 or a road. Do not dig at a diagonal! Doing so will make it very inconvenient to use your connecting tunnel.
It is important to connect to a public highway/road by the shortest distance. Not only because it saves you work but because long access tunnel can interfere with the access tunnels of other players, now or in the future. If you do not connect to Highway 115 via the shortest route, the Connection Consortium may remove your access tunnel at our discretion.
After you have encountered a path, you’re connected! Remember to not remove or change anything about the highway itself such as the carpets, slabs, buttons, ice, etc. I recommend making your connection tunnel at least three blocks tall and two blocks wide (like the inside dimensions of the smallest nether portal). Just write two signs at your tunnel entrance and portal with your username, and you’re done! Welcome to Highway 115!
As soon as possible, please mob proof your access tunnel and perhaps Submit a Location! For advice about designing your connection, see Designing Your Connection.
Please contact me (intellyspark) on Discord if you have any questions.
What to Do with Unintentionally Linked Portals
Uh oh, you set up your new portal in the Overworld and what happens? It is linked with someone else’s portal! In the event that this happens, you should continue with the guide like normal except for a few differences. First, you obviously can’t break their Nether portal so you’re going to have to get 10 more obsidian the old fashioned way. The second difference is to look around when you arrive at your equivalent coordinates in the Nether. Check to see if there is any other portal within 16 blocks of your target coordinates. If there is, that’s a major problem and you’ll have to contact IntellySpark to resolve it. Otherwise, you can continue like normal. If the linking problem still occurs, please contact intellyspark on Discord.
Page Information
Last updated: December 26, 2023 at 15:27 EST
To-do:
- Add links to other guides
